Easy to Sew Dust Filter! It's Reusable Of Course! :)
We recently remodeled our cottage and only have hardwood flooring, ceramic tile and a couple of very low pile rugs. Our fur kid is an integral part of our family dynamics and she has the most wiry white hair so I have to vacuum daily. The Dirt Devil Simpli-Stik vacuum with its tremendous suction is PERFECT for us. Bye Bye pet hair and dust and dirt!
The vacuum came with one filter. I always made sure to clean off the excess dirt and dust from the filter after each use, though I knew eventually I would need to order more filters. So, I did. I absolutely LOVE my vacuum and the new filters are great too, but I decided to try my hand at making my own DIY dust filters.
If you have this particular model you are a SMART SHOPPER and in luck because my tutorial is, of course, how to sew filters for this vacuum. However, take a look at your canister vacuum and see if this same idea can be easily modified to suit your vacuum.
So, here we go:

Cambric is the name of the dust cover material found stapled under furniture. You may have used it in upholstery work. It is what I chose to make my DIY dust filters. Even if you've never worked with this stuff before, it's a piece of cake! This cambric was purchased on Amazon and is 100% polypropylene. It is very affordable material. You can get it here: Dritz 44296 Dust Cover Upholstery Fabric, Charcoal, 36-Inch by 5-Yard
The cambric is so lightweight. Layer the material so you cut out several new filter pieces at one time.

1. Fold fabric piece in half with edges even. In a straight stitch on your machine, sew along side edge 1/8" from edge of fabric.
2. Sew 1/8" from bottom edge of fabric.
3. This is what your piece will look like once sewn.
4. Turn filter right side out and slip over the plastic filter form. (You'll note in picture 3 I rinsed off the plastic form. Now it's just like new!)

5. I used one of those thick rubber bands that come with vegetables sometimes at the grocers to secure the newly sewn filter over the base of the plastic form. You could also use inexpensive zip ties from the hardware store, but those would have to be cut each time the filter is removed for cleaning.
6. and 7. Showing the inside of the filter, over the form and once the form is placed into the vacuum canister.

9. Lots of pet hair in the bottom of the easy-to-empty canister too.
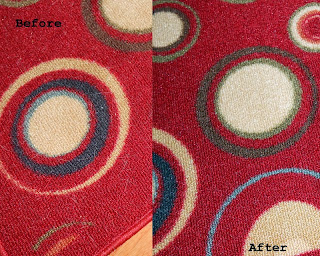
10. Another look at the AFTER. See how the cambric fabric filter worked exceptionally well to keep the dust out of the motor in the upper part of the vacuum?
 The polypropylene cambric fabric is super easy to clean. Polypropylene does not absorb water so it air dries in a jiffy. To clean this DIY dust filter remove it from the plastic filter form, shake off excess dirt and dust in trash can, rinse quickly under running water. Hang to air dry. :)
These filters take less than two minutes to make. Not kidding! Once you've cut them out which takes like 30 seconds, sewing on the machine may take another minute.
Please let me know how your project turns out. Feel free to share the link to this tutorial so others can give this idea a try. :)
---------------------------------------------------------------
This is it! Here's the vacuum I've been bragging about. It is a super lightweight but very hard-working stick vacuum on Amazon. You have to check this out! This vacuum cleaner is less than $20!!! Not kidding! Order at least $35 worth of stuff from Amazon and the shipping is also free even if you live in Hawaii like I do. (Or Alaska too).


And IF you should decide DIY dust filters aren't in your future, these are the correct dust filters for this super duper vacuum cleaner. And I've used these filters. They are great too! (For some reason they are listed incorrectly on the Amazon site).
 Pin It Tweet

The vacuum came with one filter. I always made sure to clean off the excess dirt and dust from the filter after each use, though I knew eventually I would need to order more filters. So, I did. I absolutely LOVE my vacuum and the new filters are great too, but I decided to try my hand at making my own DIY dust filters.
If you have this particular model you are a SMART SHOPPER and in luck because my tutorial is, of course, how to sew filters for this vacuum. However, take a look at your canister vacuum and see if this same idea can be easily modified to suit your vacuum.
So, here we go:
How I Made a Dust Filter for My Vacuum
 |
| Removing Old Dust Filter |
I used my seam ripper for sewing and removed the machine stitches holding the old filter to the plastic form. I need this old filter to use as a pattern to make my DIY dust filter.
 |
| Carefully Remove Stitching Along Seam Lines of Old Dust Filter
|
 |
| Lay Old Dust Filter Flat to Serve as Pattern Piece
|

Cambric is the name of the dust cover material found stapled under furniture. You may have used it in upholstery work. It is what I chose to make my DIY dust filters. Even if you've never worked with this stuff before, it's a piece of cake! This cambric was purchased on Amazon and is 100% polypropylene. It is very affordable material. You can get it here: Dritz 44296 Dust Cover Upholstery Fabric, Charcoal, 36-Inch by 5-Yard
 |
| Place pins close to edge of filter (INSIDE old seam lines.) |
Sewing the Dust Filter

1. Fold fabric piece in half with edges even. In a straight stitch on your machine, sew along side edge 1/8" from edge of fabric.
2. Sew 1/8" from bottom edge of fabric.
3. This is what your piece will look like once sewn.
4. Turn filter right side out and slip over the plastic filter form. (You'll note in picture 3 I rinsed off the plastic form. Now it's just like new!)

5. I used one of those thick rubber bands that come with vegetables sometimes at the grocers to secure the newly sewn filter over the base of the plastic form. You could also use inexpensive zip ties from the hardware store, but those would have to be cut each time the filter is removed for cleaning.
6. and 7. Showing the inside of the filter, over the form and once the form is placed into the vacuum canister.
Does It Work? See for yourself! :)

8. Yuk!!!! Ewwwwwwwwwwww!!! Yep, it works! 9. Lots of pet hair in the bottom of the easy-to-empty canister too.
10. Another look at the AFTER. See how the cambric fabric filter worked exceptionally well to keep the dust out of the motor in the upper part of the vacuum?
Best of All......It's Reusable!

These filters take less than two minutes to make. Not kidding! Once you've cut them out which takes like 30 seconds, sewing on the machine may take another minute.
Please let me know how your project turns out. Feel free to share the link to this tutorial so others can give this idea a try. :)
---------------------------------------------------------------
This is it! Here's the vacuum I've been bragging about. It is a super lightweight but very hard-working stick vacuum on Amazon. You have to check this out! This vacuum cleaner is less than $20!!! Not kidding! Order at least $35 worth of stuff from Amazon and the shipping is also free even if you live in Hawaii like I do. (Or Alaska too).
And IF you should decide DIY dust filters aren't in your future, these are the correct dust filters for this super duper vacuum cleaner. And I've used these filters. They are great too! (For some reason they are listed incorrectly on the Amazon site).
Pin It Tweet


Wow, you're so ingenious! This makes me want to buy the vacuum so I can make some filters! I wonder how it works on carpet. I only have hard floors in my bathrooms and kitchen.
ReplyDeleteThis vacuum has tremendous suction, but it doesn't have brushes on the bottom which carpet sweepers have. It works brilliantly on the few low pile scatter rugs I have here, but our floors are all hardwood and tile. I love this vacuum; not kidding! :)
ReplyDeleteVery smart DIY! Easy to follow even for someone who neither sews nor sings. :-)
ReplyDeleteCamelia Brown: So smart tip for using vacuum cleaner. Thanks for sharing with us. I love your blog so much!
ReplyDelete